It’s been almost a year since I’ve last brewed a Milkshake IPA. Since the last batch was so well received, I decided to give it another go and combine my do’s and don’ts from my brew notes with my latest findings with brewing New England IPA. I decided to omit the apple puree and change the fruit/flavor contributions. This will also be a short boil (30 min) no-sparge, meaning I mashed with the full volume of liquor and omitted a sparge. Aside from those factors, not much has changed from my last batch. The double milkshake was great, but for the warm spring into summer months, a DIPA is a bit much.
My brewing partner for the day was John, the Michigan Beer Guy from the BEER NUTS PODCAST. He was finishing up his London Porter as I began to mash in.
2.5 gallon batch
Grains/Fermentables:
Two Row
White Wheat
Flaked Wheat
Flaked Oats
Carafoam
Flaked Oats
Hops:
Columbus
Amarillo
Mosaic
Citra
Other Ingredients:
Lactose
Yeast Nutrient
Calcium Chloride
Gypsum
Lactic Acid
Orange Zest (5 large)
Vanilla Bean
Yeast:
WLP030 Thames Ale

I mashed at 152F for 60 minutes. My water adjustments were about spot on. Ten minutes into my mash, the PH came in at 5.2. During the Saccharification Rest, I proceeded to zest 3 large navel oranges. John had a few others sitting around, so I added the zest of 2 additional blood oranges. At first I didn’t realize they were blood oranges. When I looked down I saw a dark red liquid covering my hand and freaked out for a second. I thought I had zested my hand open. After a good laugh, I mashed out and lit the burner.


A boil was achieved shortly after. 10 minutes passed and I had added my bittering charge. I then added a moderately heavy 5 minute addition and added my orange zest at flameout. I immediately turned on the immersion chiller and quickly cooled to 170F where I added 7oz of hops for my hopstand/whirlpool addition. The hops were allowed to steep for 20 minutes before the wort was chilled to 70 degrees, transferred to my fermentation keg, and aerated using my drill attachment. I measured an original gravity of 1.068 which was shy of my target 1.072. I attribute this to the lack of sparge.


I pitched yeast that was from the White Labs vault known as Thames Ale yeast. It was described as, “Banked back in 2001. Very flocculant strain great for all things English. Great for porters, stouts, ESBs. Lower ester production than most English strains but creates a bigger mouthfeel than most cleaner strains.” Watch it kick ass since it’s not readily available.
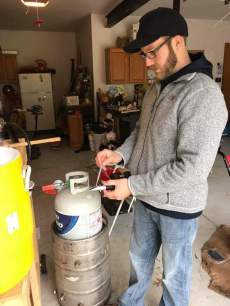
Since my fermenters were tied up with Olde Ale, I decided to try something that I’ve been considering revisiting for a long time; fermenting under pressure. The idea here is to stop the fruity (dare I say juicy) aromas from escaping during fermentation and instead, dissolve those into the beer providing a unique flavor. I purchased a spunding valve from Williams Brewing (I believe) and attached it to the “in” post of the keg and sealed it up. I set a base adjustment on the valve and decided to check on it every few hours to find a good pressure as this did not come with a gauge. I believe there is merit to this process as it was brought to my attention by a reader that tree house advertises on their growlers that their beers are naturally carbonated. Given tree house beers taste like no other due to their yeast esters, this could be the missing link in my process.


Fermentation began in a little over 24 hours. Regardless of the spunding valve adjustment, there was moderate to low pressure in the keg during fermentation. If I had to guess, I’d say 4-5lb. Just enough to make a quick hiss when you released the valve on the keg.
On the third day of fermentation, I directly added my dry hops to the keg. The off-gas smelled amazing in the keg for the brief second it was open.
The beer was cold crashed after 10 days in the keg for 48 hours prior to transferring to the serving keg. The serving keg is attached to my clear beer draught system. In the bottom of this keg lives 3 sliced and split vanilla beans that have been in a tincture of everclear for 3 days. Typically I would double dry-hop here, but they hops aren’t the main event. The hops, vanilla, lactose, and orange should work together in harmony.
Since the beer was carbonated during fermentation, I was unable to get a FG reading. That’s ok. When it’s done, it’s done. Software anticipates it finishing around 1.020 with the lactose additions and 1.014 without.

After 24 hours in the keg, I took my first pull. I was very pleased with the finish. The nose is a combination of vanilla, light orange and floral melon from the mosaic dry hop. The added heft from the lactose is a welcome addition. There are tons of good esters in this beer. I am not sure if I attribute that to the yeast or the pressurized fermentation process. An excellent beer! Next time I will add more zest to the keg as I feel much was lost in the hot side.
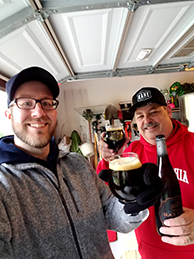
Cheers!

Great post and recipe, but I’m puzzled by the statement that you couldn’t determine the FG? Are you saying that you couldn’t pull a sample from the pressurized keg? Or that the carbonation interferes with gravity reading? If the latter, simple solution is to pull your sample and “shake out” the carbonation to produce a flat sample, then take the gravity. Cheers and love the blog, keep it up!
LikeLike